
Fiberglass fenders are a popular choice for cars due to their lightweight and durable nature. How to fix fiberglass fenders involves the following steps:
- Assess the Damage: Identify cracks, holes, or deep scratches.
- Prepare the Surface: Clean the area and sand around the damaged part to remove any paint and create a smooth surface for the repair.
- Apply Fiberglass Repair Kit: Use a fiberglass repair kit, applying resin and fiberglass cloth over the damaged area.
- Sand the Repaired Area: Once cured, sand it smooth.
- Prime and Paint: Finish with primer and paint to match the fender.
This restores the strength and appearance of your fiberglass fender.
1.Understanding Fiberglass Fender Repair
Knowing how to fix fiberglass fenders is essential if you want to maintain your car’s appearance and functionality without spending a fortune on professional repairs.
Some common causes of damage include:
- Minor collisions
- Road debris (rocks, gravel)
- Weather-related wear (rain, sun exposure)
If you catch the damage early, you can prevent it from worsening, which could eventually lead to higher repair costs.
Plus, maintaining the fiberglass fender is key to protecting your car’s exterior.

2. Essential Tools and Materials for Fiberglass Fender Repair
Before jumping into the repair, you’ll need a few essential tools and materials to get the job done efficiently. Don’t worry, you don’t need professional-grade equipment.
Here’s what you’ll need:
- Fiberglass Repair Kit: These kits usually include everything you need, like resin, hardener, and fiberglass cloth. Make sure you get one that’s suitable for automotive repairs.
- Sandpaper (various grits): You’ll need sandpaper to smooth out the surface before and after the repair. Start with a lower grit to remove damaged areas, then move to higher grits for a smooth finish.
- Applicator (or putty knife): For applying resin to the fender.
- Primer and Paint: After the repair, you’ll want to prime and repaint the area to blend it with the rest of the fender.
- Safety Gear: Gloves and a mask are essential to protect yourself from harmful chemicals in the resin and fiberglass.

Why are these tools important? Using the right materials ensures that your repair job will last.
High-quality resin and fiberglass cloth provide a solid fix that withstands the wear and tear of everyday driving.
Once you have your tools ready, you’re prepared to start the actual repair process. Remember, it’s all about taking your time and being thorough.
3. How to Repair Cracks in Fiberglass Fenders
Fixing cracks in fiberglass fenders might seem tricky at first, but by breaking it down step by step, you’ll find it’s more manageable than expected.
Step 1: Clean the Damaged Area
Start by cleaning the area around the crack thoroughly. Dirt, grease, and debris can interfere with the bonding process, so grab a rag and some soap or degreaser to wipe everything down.
A clean surface will help the resin adhere better.

Step 2: Sand the Area
Next, use sandpaper to roughen up the surface around the crack. This allows the resin to bond with the fiberglass more effectively. Start with a medium-grit sandpaper (around 80-100 grit) and gently sand the surrounding area. Be careful not to sand too much—just enough to create a rough surface for the resin to stick to.

Step 3: Prepare the Fiberglass Repair Kit
Now, open your fiberglass repair kit and prepare the resin and hardener according to the manufacturer’s instructions. Typically, you’ll mix the resin with the hardener to create a solution that cures once applied.

Step 4: Apply the Resin and Fiberglass Cloth
Cut a piece of fiberglass cloth to fit over the crack, then apply a layer of the mixed resin to the fender. Place the fiberglass cloth over the resin and apply another layer of resin on top, making sure the cloth is fully saturated.

Step 5: Let It Cure
Once the fiberglass and resin are in place, leave the repair to cure. The curing time will depend on the product you’re using, but it’s usually a few hours to a full day. Be patient and allow the repair to fully harden.
Step 6: Sand Again for a Smooth Finish
After the resin has cured, sand the area again with fine-grit sandpaper (around 220 grit). The goal here is to smooth out any bumps or uneven spots in the repair.
4. Sanding, Priming, and Painting the Fender
With the cracks filled and smoothed out, the next steps are all about getting your fender looking polished and professional again.
Step 1: Sand the Entire Area
Once the repair is smooth, you’ll want to sand the whole area that you’ll be painting. Use a fine-grit sandpaper for this step (320-400 grit). The smoother the surface, the better the primer and paint will adhere.

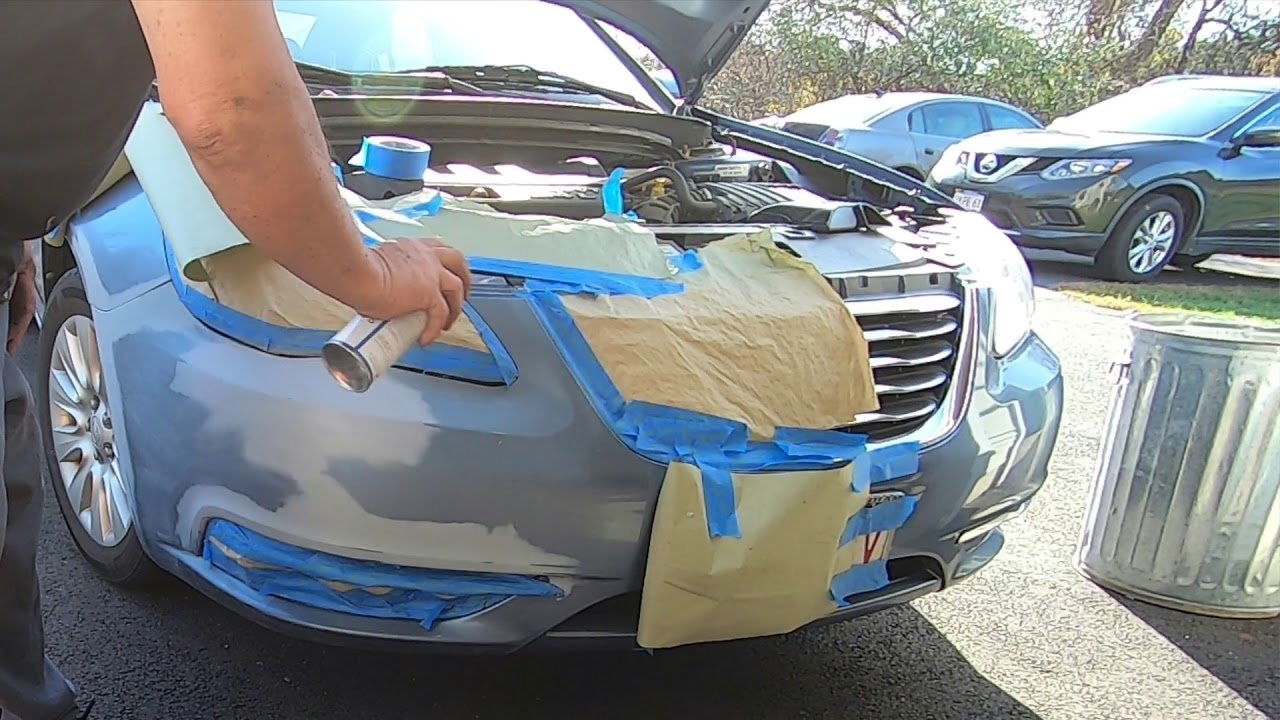
Step 2: Apply Primer
Now that your fender is sanded, it’s time to apply a coat of primer. Use an automotive primer that’s specifically designed for fiberglass.
Spray an even coat over the repair and surrounding area, and let it dry fully before moving on.
Step 3: Paint the Fender
After the primer dries, it’s time to paint. Make sure you’re using the same color as the rest of your car.
Apply multiple light coats of paint rather than one heavy coat—this prevents runs and ensures an even finish.

Step 4: Finish with a Clear Coat
To protect your new paint job, apply a clear coat once the paint is dry. This will add a glossy finish and protect the paint from UV damage and minor scratches.
With these steps, you’ll have a smooth, seamless repair that’s both functional and visually appealing!

5. Common Mistakes to Avoid When Fixing Fiberglass Fenders
When fixing a fiberglass fenders, it’s easy to make mistakes that could compromise the quality of your repair job. Here are some common mistakes:
Using the Wrong Materials
One of the biggest errors is not using proper fiberglass repair kits. If you opt for cheaper materials, you risk an ineffective repair that won’t last. Always use fiberglass resin and cloth specifically designed for automotive use.
Not Sanding Enough
Rushing through sanding can lead to uneven surfaces, which makes it hard for the resin to bond properly. Make sure the area is thoroughly sanded before applying any resin or primer.
Over-applying Resin
Too much resin can result in a bulky, uneven repair that’s difficult to sand down later. Always apply thin, even layers and smooth them out with an applicator.
6. Aftercare and Maintenance of Fiberglass Fenders
Once your fiberglass fender is repaired and looking great, it’s important to maintain it properly to ensure longevity. Here are a few tips to keep your fender in top condition:
Regular Cleaning
Keep your fenders clean by washing them regularly with mild soap and water. This helps remove dirt and debris that can wear down the surface over time.
Inspect for Damage
Check your fenders frequently for new cracks, chips, or scratches. Early detection can help you avoid more significant repairs down the road.
Wax the Surface
Applying a layer of automotive wax every few months adds a protective coating to the surface, preventing damage from UV rays and minor abrasions.
By following these aftercare tips, your fiberglass fender will remain strong and visually appealing for years to come.
7. Choosing Between DIY vs. Professional Fiberglass Fender Repair
Deciding whether to repair your fiberglass fender yourself or take it to a professional depends on several factors.
DIY Repair
If you’re confident in your skills and have the right tools, a DIY fiberglass fender repair can save money. But, it requires time, precision, and patience. It’s ideal for minor cracks and small damage.
For this approach, make sure to follow the proper techniques for sanding, applying resin, and painting to avoid future issues.
Professional Repair
For larger or more complicated repairs, going to a professional is often the safer bet. Professionals use advanced techniques and have access to specialized equipment.
They can ensure a smooth finish and long-lasting durability. While this may be more costly, it guarantees a polished result, especially for severe damage.
8. How to Prevent Future Damage to Fiberglass Fenders
While knowing how to fix fiberglass fenders is important, it’s even better to avoid future damage altogether. Here are some tips to keep your fenders in great shape:
Regular Inspections
Make it a habit to inspect your fenders for any small cracks or damage. Fixing minor issues early can prevent them from becoming bigger and costlier problems.
Drive Carefully
Being cautious when parking, driving through rough terrain, or towing can significantly reduce the chances of damaging your fenders. Avoid collisions and minor bumps that can cause scratches or cracks.
Use Protective Coatings
Applying a protective coating, like a wax or ceramic coating, helps shield the fiberglass from harsh UV rays, moisture, and minor abrasions. This adds longevity to your fender’s surface, keeping it stronger for longer.
By taking these preventative measures, you can keep your fiberglass fenders looking great and avoid the need for frequent repairs!
For more details you can read this article