How to Roll Your Car Fenders is a crucial process if you’re planning to lower your car or install wider wheels to avoid tire rubbing. Here’s a basic guide:
- Gather Tools: You’ll need a fender roller tool, heat gun, and jack stands.
- Prep the Area: Clean the fender and wheel well.
- Lift the Car: Use jack stands for safety.
- Heat the Fender: Use a heat gun to soften the paint and prevent cracking.
- Roll the Fender: Slowly use the fender roller, applying steady pressure.
This process helps protect your tires from rubbing against the fender.
1. Why and how you Roll Your car Fenders in detail?
How to Roll Your Car Fenders is all about creating more space in your wheel wells by bending the inner lip of your fenders. This modification helps prevent your tires from rubbing against the fender, especially if you’re rocking wider tires or a lowered suspension.
It’s a pretty crucial step if you’re looking to improve your car’s stance or fitment without risking damage to your tires or fenders.
You might be wondering, “Is this really necessary?” Well, if you’ve ever heard that annoying scraping noise when you turn or go over bumps, fender rolling could be your solution.
It’s not just about avoiding damage, it’s also about achieving that sleek, flush look that every car enthusiast loves.
Plus, you don’t need to be a pro to do this. With the right tools and a bit of patience, rolling your fenders can be a straightforward DIY project that saves you a trip to the body shop.
So, let’s go deep into what you need and how to get started.
2. Tools You’ll Need
Here’s a quick rundown of the essentials on How to Roll Your Car Fenders:
Fender Roller Tool: This is your main piece of equipment. It’s specifically designed to attach to your car’s hub and roll the fender lip safely and smoothly.
Heat Gun or Hairdryer: Heat is your friend when it comes to rolling fenders. It helps soften the paint and metal, reducing the risk of cracking or chipping. A heat gun works best, but a hairdryer can also do the trick if you’re in a pinch.
Car Jack and Jack Stands: You’ll need to lift your car and keep it securely in place while you work. Make sure you’ve got a reliable jack and stands that can handle your car’s weight.
Wrench and Socket Set: These will come in handy for removing your wheels and attaching the fender roller.
Masking Tape: Applying a layer of masking tape to the fender edge can add an extra layer of protection against scratches and chips.
Gloves: Safety first! Gloves will protect your hands from heat and sharp edges while you’re working.
If you don’t have a fender roller and don’t want to buy one, there are a few alternatives. Some folks use a baseball bat or a rubber mallet to roll the fender lip, but these methods can be risky and less precise. If you’re after a clean, professional look, sticking with a proper fender roller is the way to go.
Now that you’ve got your tools ready, you’re well on your way to rolling those fenders and getting your car looking just how you want it like a pro.
3. A Detailed Guide on How to Roll Your car Fenders:
Rolling your car fenders might sound intimidating, but if you take it step by step, you’ll find it’s not as tricky as it seems. Here’s how to do it:
Step 1: Prepare Your Workspace
First things first, make sure you have a clean and organized workspace. Rolling fenders requires some precision, so you don’t want to be tripping over tools or working in a cluttered area.
Park your car on a flat surface, preferably in a garage or driveway, and gather all your tools nearby. It’s a good idea to have some extra light handy if you’re working in a dim area.
Step 2: Jack Up the Car and Remove the Wheel
Next, you’ll need to lift the car using your jack and secure it with jack stands. Make sure the car is stable before you start working on it. Once the car is safely lifted, remove the wheel of the fender you’re going to roll. This gives you clear access to the fender and the area you’ll be working on.
Step 3: Heat the Fender Edge
Before you start rolling, it’s crucial to heat the fender’s inner lip. This step is all about preventing the paint from cracking or chipping as you bend the metal.
Use your heat gun or hairdryer to gently warm up the fender edge. Move the heat source back and forth along the area you plan to roll, ensuring it gets evenly heated.
Be patient here—taking your time will save you from a potential paint job later.
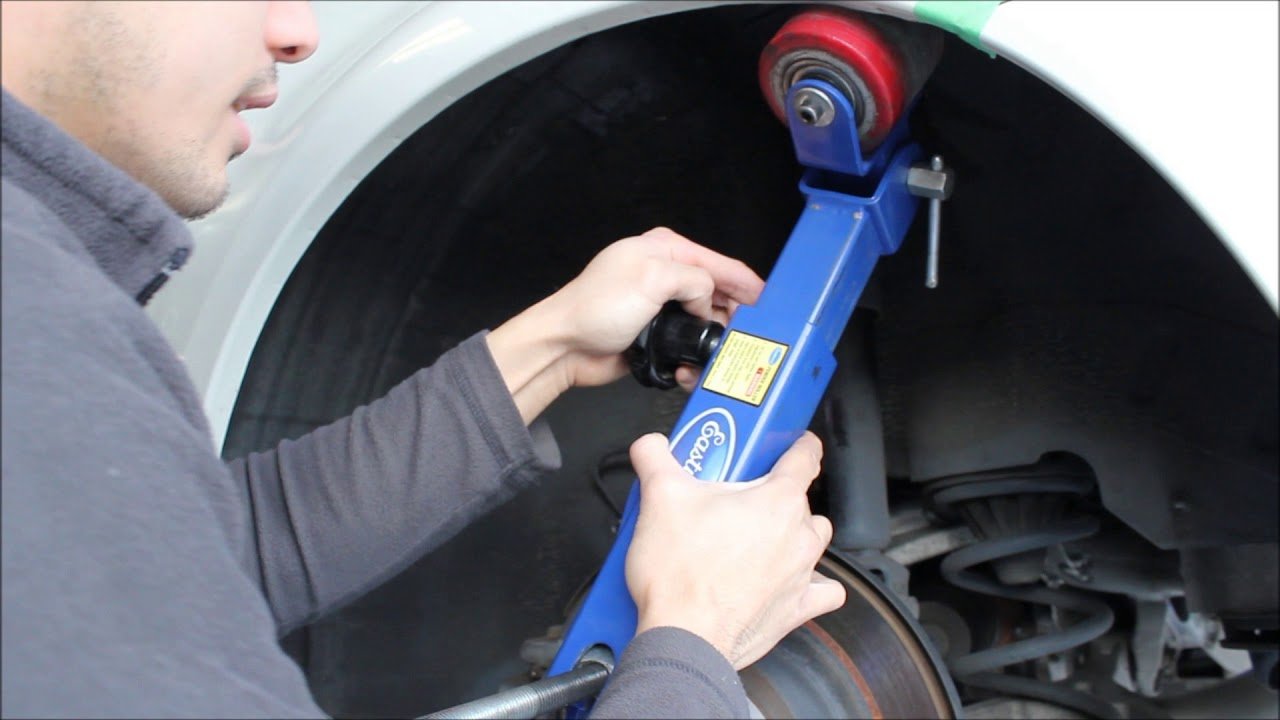
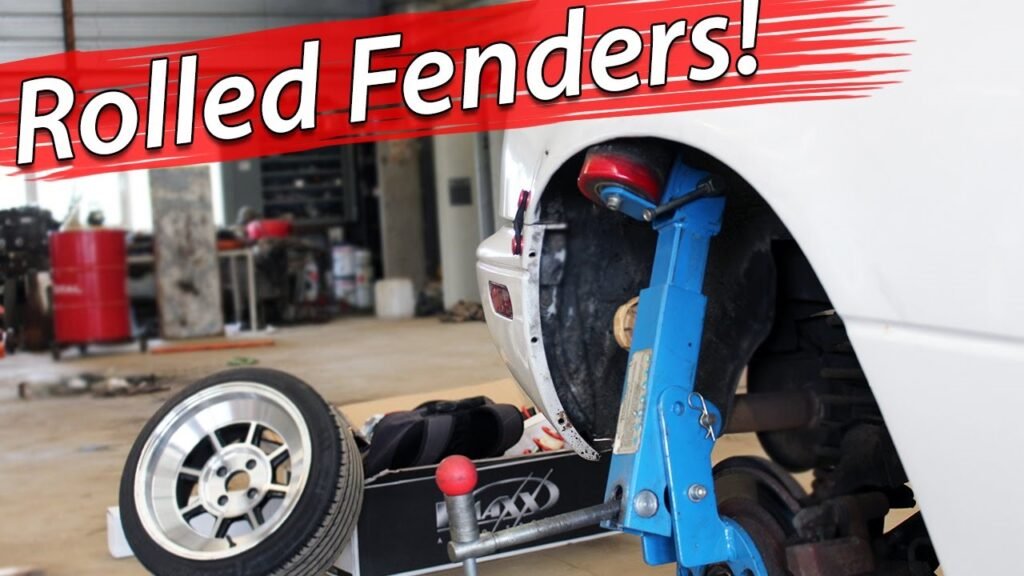
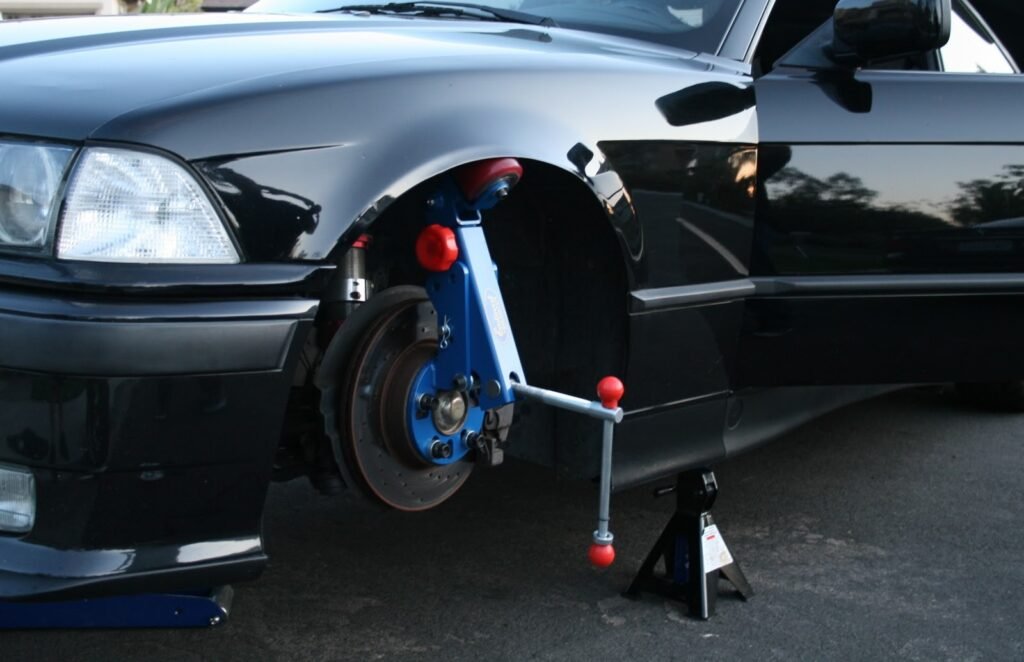
Step 4: Use the Fender Roller
Now, it’s time to attach the fender roller to the car’s hub. Adjust the roller’s height to align with the inner lip of the fender. Start slowly, applying gentle pressure as you roll the tool back and forth along the fender’s edge. The goal here is to gradually bend the lip upwards, creating more clearance for your tires.
Don’t rush this step. Take your time and keep the fender heated as you work.
Step 5: Recheck for Clearance and Adjust If Needed
After you’ve rolled the fender, it’s important to check for clearance. Reattach the wheel and lower the car back onto the ground. Turn the steering wheel to check for any signs of rubbing or contact. If you notice any issues, you might need to lift the car again and make further adjustments.
It’s better to do it right the first time than to risk damaging your tires or fenders later on.
And that’s it! With these steps, you should have successfully rolled your fenders and increased your car’s clearance. It’s a simple process, but attention to detail is key.
4. Common Mistakes to Avoid
Even with the best intentions, it’s easy to make a few mistakes when rolling your fenders. Here are some common mistakes and how to avoid them:
Rushing the Process
One of the biggest mistakes is rushing through the job. Rolling fenders takes time, especially if you want to avoid damaging your car. Skipping the heating step or applying too much pressure too quickly can lead to cracked paint or warped fenders.
Take it slow, and make sure the fender is properly heated before each pass with the roller.
Not Using Enough Heat
As mentioned earlier, heat is essential in preventing the paint from cracking. Some people might underestimate how much heat is needed or forget to reapply it as they work. Make sure the fender stays warm throughout the entire process, and don’t be afraid to stop and reheat as necessary.
Applying Too Much Pressure
It’s tempting to try and roll the fender in one go by applying a lot of pressure, but this can do more harm than good. Gradually increasing pressure as you roll will give you a much smoother finish and reduce the risk of damaging the fender or paint.
Skipping the Clearance Check
Once you’ve rolled the fenders, it’s important to check for tire clearance. Failing to do this could result in the tires still rubbing against the fenders, defeating the whole purpose of the project. Always double-check your work before hitting the road.
By avoiding these common mistakes, you’ll be well on your way to a successful fender rolling job. Remember, the key is to take your time, use the right tools, and be patient. Happy rolling!
You can also see this article on how to roll your car fenders.
FAQs on how to Roll Your Car Fenders
1. What is fender rolling, and why should I do it?
Fender rolling involves bending the inner lip of your car’s fenders to create more clearance for wider tires or lowered suspension. It helps prevent tire rub and can improve your car’s stance without damaging the tires or fenders.
2. Can I roll my fenders without a fender roller?
Yes, you can use alternative methods like a baseball bat or rubber mallet, but these are riskier and less precise. A proper fender roller is recommended for a cleaner, safer job.
3. How long does it take to roll fenders?
The process can take anywhere from 1 to 3 hours, depending on your experience and the tools you’re using. Rushing the job can lead to mistakes, so it’s best to take your time.
4. Will rolling my fenders crack the paint?
If done incorrectly, rolling fenders can crack the paint. To avoid this, use a heat gun or hairdryer to warm the fender edge before rolling, which softens the paint and metal.
5. Is fender rolling a permanent modification?
Yes, fender rolling is generally considered a permanent modification since it involves bending the metal of the fender. However, it’s a subtle change that doesn’t usually affect the overall appearance of your car.
How to Roll Your Car Fenders