Many people think that installing boat trailer fenders is a complicated and expensive process, best left to professionals. But guess what? That’s far from the truth! In reality, how to install boat trailer fenders is a simple DIY task that almost anyone can handle. With the right guide, tools, and a little patience, you’ll be able to do it yourself without any professional help. Plus, it’s a great way to save money and keep your boat trailer in top condition.
Tools and Materials You Will Need
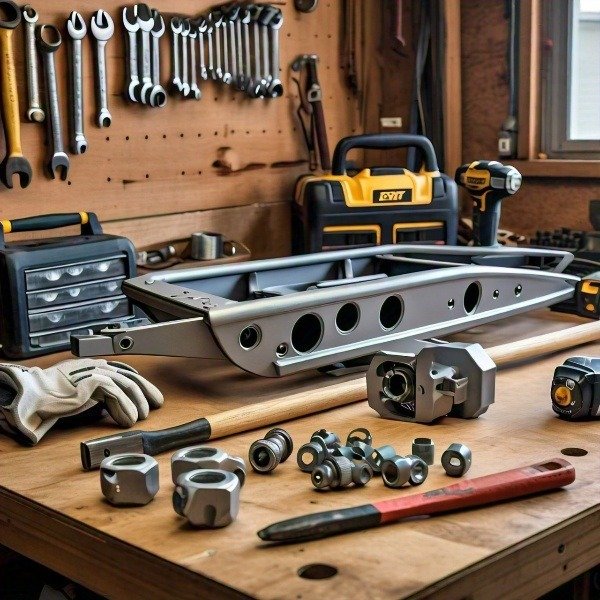
Before you get started on this easy DIY project, make sure you have the right tools and materials on hand. This makes the process smooth and ensures that the fenders are properly secured to your boat trailer. Here’s a list of what you will need.
Tools
1-A set of wrenches
2-Socket set
3-Measuring tape
4-Power drill
5-Safety gloves
Materials
1-New boat trailer fenders
2-Bolts and nuts (usually provided with the fenders)
3-Fender brackets (if not already attached)
4-Rust-resistant paint (optional, for extra protection)
Having these tools ready beforehand will help you avoid unnecessary delays, and trust me, you will thank yourself later for being prepared.
Choosing the Right Tools Matter
Using a good-quality socket set or power drill speeds up installation and ensures secure fender attachment. Loose fenders can damage your trailer and boat, so it’s vital to tightly secure everything. The tools you pick can make or break the installation process.
Best Kind of Fenders
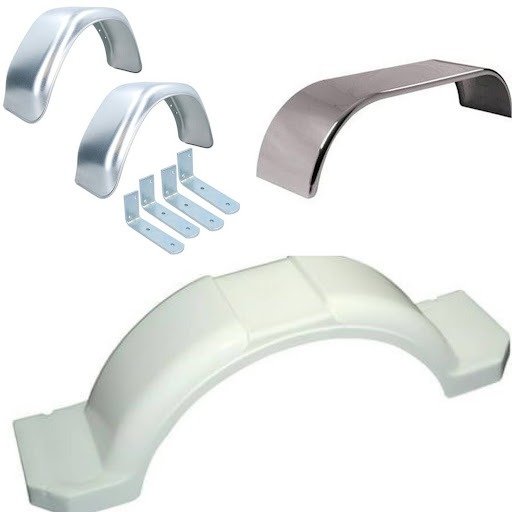
Not all boat trailer fenders are created equal. Depending on your trailer and personal preferences, you can choose between galvanized, aluminum, or plastic fenders. Each type has its own advantages.
Galvanized fenders are durable and resistant to rust.
Aluminum fenders are lightweight but strong.
Plastic fenders are budget-friendly and easy to install.
Choosing the right type of fender depends on the environment you’re using your trailer in and your budget. How to install galvanized boat trailer fenders is slightly different from installing plastic or aluminum fenders, but we’ll get into that in future sections.
Getting Ready to Install Fenders on Your Boat Trailer
Before jumping into the actual installation, it’s crucial to make sure your boat trailer is ready for new fenders. This step is often overlooked, but it’s essential for a successful installation. First, inspect your trailer for any rust, dirt, or existing damage. You want a clean surface to work on, as this makes the process smoother and ensures better adhesion.
1-Clean the Trailer
Start by scrubbing down the areas where the fenders will be attached. Use a wire brush or sandpaper to remove any rust or dirt. This helps the fenders stay secure over time.
2-Measure Twice
Always measure the area twice before drilling any holes or attaching the fenders. This ensures perfect alignment and avoids costly mistakes.
Guide to Installing Boat Trailer Fenders
Now that your boat trailer is prepped and ready, it’s time to get into the actual installation process. Don’t worry, I’ll walk you through everything step-by-step, making sure it’s simple to follow. Whether you’re working with galvanized or plastic fenders, the process is pretty straightforward. Just follow along, and you’ll have your boat trailer looking like new in no time.
1 -Preparing the Trailer for Installation
Before we start attaching the fenders, let’s make sure everything is lined up perfectly. Proper preparation will save you a lot of headaches down the road. Here’s how to do it.
Park the Trailer on a Flat Surface
Always make sure your trailer is stable and on a flat surface. This makes the installation safer and ensures the fenders are evenly positioned.
Measure and Mark
Use your measuring tape to determine the exact spot where the fenders will be attached. Make sure both sides are even so that your fenders are aligned correctly. Mark the spots where you’ll need to drill holes for the brackets.

2- Mounting the Fenders
Now comes the fun part — mounting the fenders. Depending on whether you’re using bolt-on fenders or welded fenders, the process can vary slightly. Here’s a simple guide for both methods.
a-For Bolt On Fenders
Follow these steps.
Attach the Fender Brackets
Line up the brackets with the marks you made earlier. Drill pilot holes if necessary and bolt the brackets onto the trailer.
Secure the Fenders
Place the fenders over the brackets and bolt them in securely. Make sure they’re firmly in place, but avoid over-tightening the bolts, which could damage the fender.
b-For Welded Fenders
Do these steps to have nice welded fenders.
Weld the Brackets
If you’re comfortable welding, carefully weld the brackets in place. Make sure they’re properly aligned before welding them to avoid issues later on.
Attach the Fenders
Once the brackets are welded, position the fenders and weld them onto the brackets. Double-check the alignment to make sure everything looks even.
3-Securing the Fender Brackets
Once the fenders are mounted, you’ll want to make sure the brackets are securely fastened. This step is key to ensuring that the fenders won’t rattle or come loose while driving.
a-Double-Check Tightness
Go over each bolt and nut to ensure everything is tightened properly. You want a snug fit, but again, don’t overtighten.
b-Check for Stability
Gently shake the fender after installation. If it moves or feels loose, re-tighten the bolts or adjust the brackets as needed.
4-Final Modifications and Testing
With the fenders in place, it’s time for some final adjustments to make sure everything is just right. This is a crucial step that ensures your fenders are securely attached and aligned properly.
a-Check the Alignment Again
Stand back and check to see if both fenders are aligned evenly. If one side looks higher or lower, adjust the brackets accordingly.
b-Test for Stability
Take the trailer for a short test drive around your yard or driveway to see how the fenders hold up. Listen for any rattling or clunking noises, which could mean the fenders need further tightening.
Expert Advice for Professionally Installing Boat Trailer Fenders
Even though we’ve covered the basics, there are a few extra tips that can really take your boat trailer fender installation to the next level. These pro tips will help you avoid common mistakes and ensure your fenders are mounted securely.
1- Avoid Over Tightening the Bolts
One of the most common mistakes people make is over tightening the bolts. Sure, you want the fenders to be secure, but too much pressure can warp the metal or crack plastic fenders. Tighten them enough to stay in place, but be gentle.
2-Use Rust Resistant Hardware
If your trailer is exposed to saltwater or harsh weather conditions, opt for rust-resistant bolts and brackets. This will increase the lifespan of your fenders and save you from having to replace them too soon. Galvanized fenders paired with rust-resistant bolts are a great option for those who frequently use their trailers near saltwater.
3- Double Check the Alignment
Misaligned fenders don’t just look bad; they can also cause uneven wear on your tires and trailer. Always double-check the alignment during installation and make adjustments as needed.
4- Regular Maintenance
After installation, make a habit of checking your fenders every few months. Ensure the bolts are still tight, and the fenders haven’t shifted. This regular maintenance will prevent bigger problems down the road.
Choosing the Right Type of Fenders for Your Trailer
Choosing the right fenders for your boat trailer can be a bit tricky, especially if you’re unsure about the differences between the types available. Not all fenders are created equal, and selecting the right one depends on your trailer’s material, how often you use it, and where you take your boat. Let’s break down the most common types of boat trailer fenders and help you decide which one fits your needs best.
1-Galvanized Fenders
If you often use your trailer in saltwater or harsh environments, galvanized boat trailer fenders are your best bet. Galvanized fenders are coated in zinc, making them highly resistant to rust and corrosion. They’re durable, strong, and can last for years without showing significant wear and tear.
2- Aluminum Fenders
Aluminum fenders are lightweight and strong, making them a great choice if you want to keep the weight of your trailer down. They don’t rust as quickly as steel but may dent more easily under heavy impacts. Aluminum fenders are perfect for trailers used in freshwater environments or places with mild weather.
3- Plastic Fenders
Plastic boat trailer fenders are a budget-friendly and versatile option. They’re resistant to rust, easy to install, and available in a variety of colors. However, they can crack under heavy loads or impact, so they might not be the best for rough conditions or heavy boats. If you’re on a budget and use your trailer infrequently, plastic fenders can do the trick.
| Best For | Pros | Cons | |
Galvanized Fenders | Saltwater use, rough weather, long-term durability. | Rust-resistant, long-lasting. | Slightly more expensive than plastic or aluminum fenders. |
| Aluminum Fenders | Lightweight needs, freshwater use, casual use. | Lightweight, rust-resistant in most conditions. | Prone to denting. |
| Plastic Fenders | Budget-conscious users, light trailers, casual use. | Affordable, rust-proof, lightweight. | Prone to cracking, not as durable as metal fenders. |
Replacement of Old or Damaged Boat Trailer Fenders
At some point, you may need to replace old or damaged fenders on your boat trailer. Whether it’s from wear and tear or an unfortunate accident, replacing your fenders is easier than you might think. Here’s a simple guide to get your trailer looking brand new again.
1- Removing the Old Fenders
The first step is to safely remove the damaged or worn-out fenders. Here’s how to do it:
Loosen and Remove Bolts-Using your wrench, carefully remove the bolts or screws holding the fenders in place. If your trailer has welded fenders, you’ll need a metal cutting tool to remove the welds.
Clean the Mounting Area– Once the old fenders are removed, clean the mounting area with a wire brush or sandpaper to get rid of any rust or dirt. This ensures the new fenders will sit flush and securely.
2- Installing the New Fenders
Once the old fenders are off, follow the same steps as mentioned in section 3 to install the new ones. Whether you’re working with galvanized, aluminum, or plastic fenders, the installation process will be similar to the initial installation.
Measure and Align-Make sure the new fenders are aligned properly before securing them in place.
Bolt or Weld-Depending on your fender type, bolt or weld the new fenders into place. Always double-check the tightness of the bolts and the stability of the welds before taking the trailer for a test drive.
3- Checking after Installation
After installing the new fenders, take a few minutes to do a post-installation check:
Check for Secure Attachment-Shake the fenders lightly to ensure they are attached securely and won’t move around while driving.
Test Drive-Take your trailer for a short test drive and listen for any unusual sounds or rattling. This will help you spot any areas that might need tightening or adjustment.
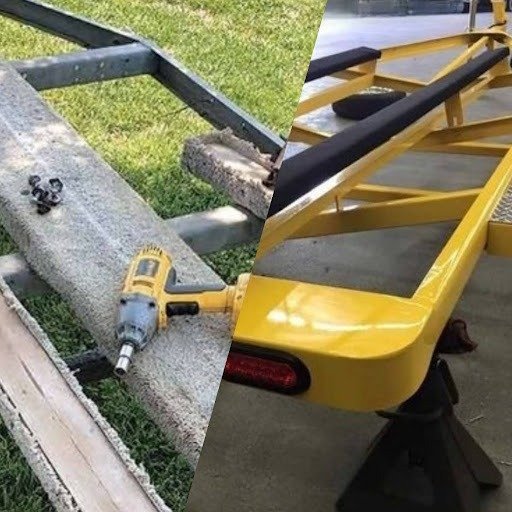
fenders vs. new fenders installed.
Common Mistakes to Avoid
Even with the best intentions, it’s easy to make a few mistakes during boat trailer fender installation. But don’t worry, here are some common pitfalls to watch out for so you can avoid them and make sure the process goes smoothly.
1- Over Tightening Bolts
One of the most frequent mistakes people make is over tightening the bolts when securing the fenders. While you want your fenders to be firmly attached, overtightening can damage the fender material, especially if you’re using plastic or aluminum fenders. Always make sure the bolts are snug but not over-cranked.
2- Misaligning the Fenders
Improper alignment of the fenders can cause uneven wear on your trailer tires and might even lead to safety hazards while driving. Always double-check your measurements and ensure the fenders are mounted at the correct height and position on both sides of the trailer.
3- Ignoring Rust and Damage
If your trailer’s mounting areas have rust or existing damage, it’s important to fix these issues before installing new fenders. Rust can weaken the attachment points and cause the fenders to come loose over time. Clean and prep the areas properly before installation to avoid future problems.
4-Choosing the Wrong Type of Fenders
Not all fenders are suitable for every environment. If you frequently use your trailer in saltwater conditions, for instance, galvanized fenders would be a better choice than aluminum or plastic. Consider where and how you’ll be using your trailer before choosing the type of fender to install.
Here’s a simple chart outlining common mistakes related to boat trailer fenders, along with tips on how to avoid them.
| Common Mistake | Description | Tips to Avoid |
| Over-tightening | Tightening fender bolts too much can lead to damage or breakage. | Use a torque wrench to ensure bolts are tightened to the manufacturer’s specifications. Regularly check for tightness without overdoing it. |
| Misalignment | Misaligned fenders can cause uneven wear and potential damage to the trailer. | Regularly inspect alignment and adjust as necessary. Ensure fenders are mounted straight and level. |
| Rust on Fenders | Rust can weaken fenders and lead to structural failure. | Apply a protective coating or paint specifically designed for metal surfaces. Regularly clean and inspect for signs of rust. |
| Ignoring Maintenance | Neglecting routine checks can lead to bigger issues down the line. | Establish a maintenance schedule to inspect fenders, bolts, and connections regularly. |
| Using Incorrect Size | Using fenders that are too small or too large can lead to inadequate protection. | Choose the right size fenders based on your boat’s dimensions and weight. Consult manufacturer guidelines for recommendations. |
Conclusion
Installing boat trailer fenders may seem like a big project at first, but as we’ve covered in this guide, it’s actually a straightforward process when broken down into simple steps. Whether you’re looking to replace old or damaged fenders or install new ones, knowing how to tackle the task will save you time, money, and the hassle of professional services. Plus, doing it yourself gives you the flexibility to ensure everything is done exactly to your standards.
1-Important Things to Remember from Installing Boat Trailer Fenders
Throughout this guide, we’ve gone over how to install boat trailer fenders, the tools you’ll need, and pro tips to ensure the job is done right. Here’s a quick recap of the most important points:
Choosing the Right Fenders
We discussed the different types of fenders galvanized, aluminum, and plastic and how to pick the best one based on your usage and environment. Each type has its strengths, but the key is selecting what fits your specific needs.
Steps Of Installation
Whether you’re bolting or welding your fenders in place, following a step by step guide is crucial to avoid common mistakes, like misalignment or over-tightening bolts. Proper alignment ensures even wear and better protection for your trailer.
Replacing Old Fenders
If you’re swapping out damaged or rusted fenders, removing them carefully and prepping the mounting surface will ensure that your new fenders sit flush and stay secure. Don’t forget to perform a post-installation test to make sure everything is stable.
Avoiding Mistakes
Simple things, like using rust-resistant bolts or checking for proper alignment, can make all the difference between a successful installation and one that gives you trouble later.
2- Why Installing Your Own Fenders is Worth It
By following this guide, you’ll save yourself a lot of money compared to hiring a professional. Plus, knowing how to install and replace your own boat trailer fenders gives you more control over your trailer’s upkeep. It also extends the lifespan of your trailer by ensuring that everything is securely installed and properly aligned.
DIY installation isn’t just about saving money; it’s also about gaining the confidence to handle your trailer maintenance independently. Once you’ve done this project, you’ll find that other maintenance tasks seem much less intimidating.
3- Final Thoughts
In conclusion, installing boat trailer fenders is a rewarding DIY project that can be done with a little planning and the right tools. From selecting the perfect type of fender to securely attaching it to your trailer, you now have everything you need to tackle the task with confidence. Remember, it’s all about preparation and attention to detail.
By following these steps, you’ll ensure your trailer stays in great condition and your boat is well-protected during transportation. And if you ever find yourself unsure, just refer back to this guide—it’s here to help every step of the way.
Click here to Check Boat Trailer Fenders
FAQs About Installing Boat Trailer Fenders
1. Do I need any special tools to install boat trailer fenders?
Nope! You don’t need anything too fancy. A set of wrenches, a power drill, and some basic hardware (bolts and nuts) will do the job. If you’re working with welded fenders, you may need a welder, but most people stick to bolt-on fenders because they’re easier to install.
2. Which type of boat trailer fender is best for saltwater use?
If you often take your boat to saltwater, galvanized fenders are your best bet. They’re coated with zinc, which makes them rust-resistant and perfect for salty environments. Aluminum fenders are also a good option, but they may dent more easily.
3. How do I know if my fenders are properly aligned?
Great question! After installing the fenders, step back and check if both sides are even. The fenders should sit at the same height above the tires on both sides. Also, take a quick test drive to make sure there’s no rattling or rubbing. If anything feels off, adjust the brackets until everything lines up perfectly.
4. Can I replace damaged boat trailer fenders myself?
Absolutely! Replacing old or damaged fenders is pretty simple. Just remove the old fenders by unscrewing the bolts or cutting the welds, clean the area, and then follow the same steps to install new fenders. It’s a great DIY project that can save you some cash.
You Might Like this