Can You Unroll Fenders? Absolutely—and it’s easier than you might think, but only if you know what you’re doing. Get it wrong, and you could be looking at cracked paint, bent metal, or a pricey repair bill.
So, why bother unrolling a fender? Maybe you rolled it to fit wider tires or to stop tire rub, but now things have changed, or maybe the roll wasn’t done right in the first place. The good news? You can reverse it.
That said, unrolling fenders takes some care. It’s not as simple as rolling them in the first place, but with the right approach, you can restore your fenders without causing damage. Let’s break down how it works.
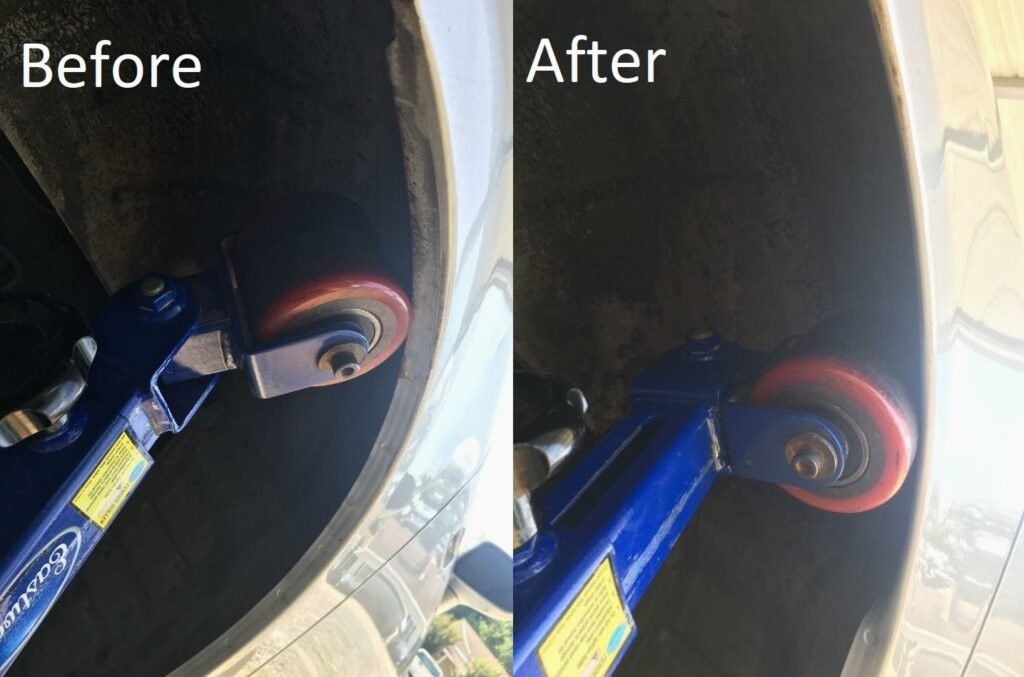
What Exactly Does It Mean to Unroll Fenders?
When we talk about unrolling fenders, we’re basically talking about reversing the process of fender rolling. If you’ve never heard of fender rolling, it’s when the inner edge of your fender is bent upward and inward to create more space between the fender and the tire. This is often done when you upgrade to wider wheels or lower your car. Rolling fenders helps avoid that awful sound of the tire rubbing against the metal when you turn or hit bumps.
But here’s the catch: sometimes you need to go back to the original fender shape, especially with materials like metal or plastic. If you’re curious about working with more specialized materials, like carbon fiber, check out this guide on can you roll carbon fiber fenders to learn more.
So, why would you want to do this?
- Fixing poor fender rolling jobs: Not all fender rolls are created equal. If someone didn’t do the job right, the fender might look bent, wrinkled, or just plain bad. Unrolling can fix that.
- Changing tire size or fitment: Sometimes after upgrading to wider tires, you realize you didn’t need the fender roll after all, or you’ve gone back to a smaller tire size.
- Restoring your car’s original look: Maybe you’re looking to restore the car back to its factory condition, and that means reversing any modifications, including fender rolls.
Unrolling fenders can be tricky, though. You’ll need specific tools and a lot of patience, but the result can be totally worth it. You’ll get your original fender look back without having to replace the whole part or live with a poorly rolled fender.
Stay tuned for the next part where we’ll dive into whether you can unroll your fenders at home and what tools you’ll need to do it right!
Can You Unroll Fenders at Home?
If you’re wondering whether you can unroll fenders at home, the answer is yes—but it takes the right tools and patience. It’s more delicate than rolling fenders, requiring precision to avoid damaging the metal or plastic. Metal fenders can bend or dent easily, and plastic ones can crack if not handled carefully. Take your time to avoid causing more damage.
So, before you dive in, ask yourself:
- Do you have the right tools?
- Are you comfortable working with car body parts?
- Do you have the patience to take your time and do it right?
If you answered “yes” to these, then you’re in a good spot to tackle this job at home. If you’re unsure, it might be worth considering a professional, especially if your car’s fenders are in delicate condition or if the damage is more severe.
Tools You’ll Need to Unroll Fenders Safely
If you’re serious about unrolling your fenders yourself, having the right tools is essential. You can’t just go at it with any old tool from the garage. Here’s a rundown of the must-have equipment:
1. Heat Gun
This is probably the most important tool you’ll need. Why? A heat gun helps to soften the paint on your fender, which reduces the chance of cracking when you start unrolling the metal. Without heating the area, you run a high risk of chipping or even cracking the paint, which can lead to expensive bodywork later on. Make sure you don’t overheat it, though—gentle, consistent heating is the key.
2. Fender Roller
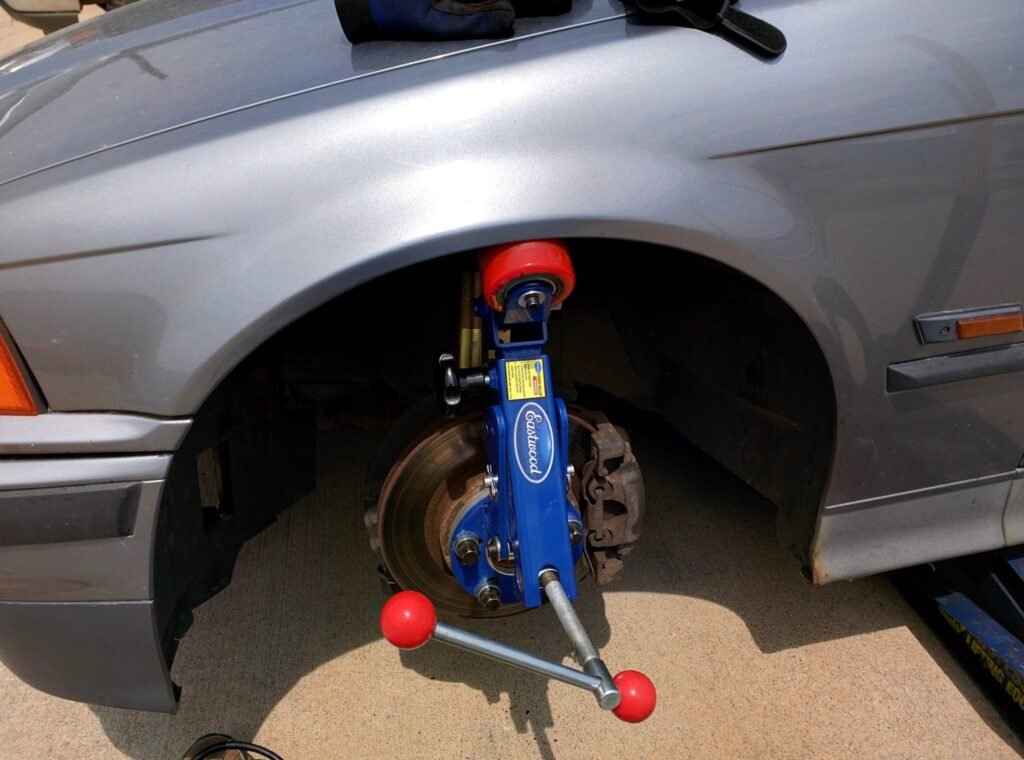
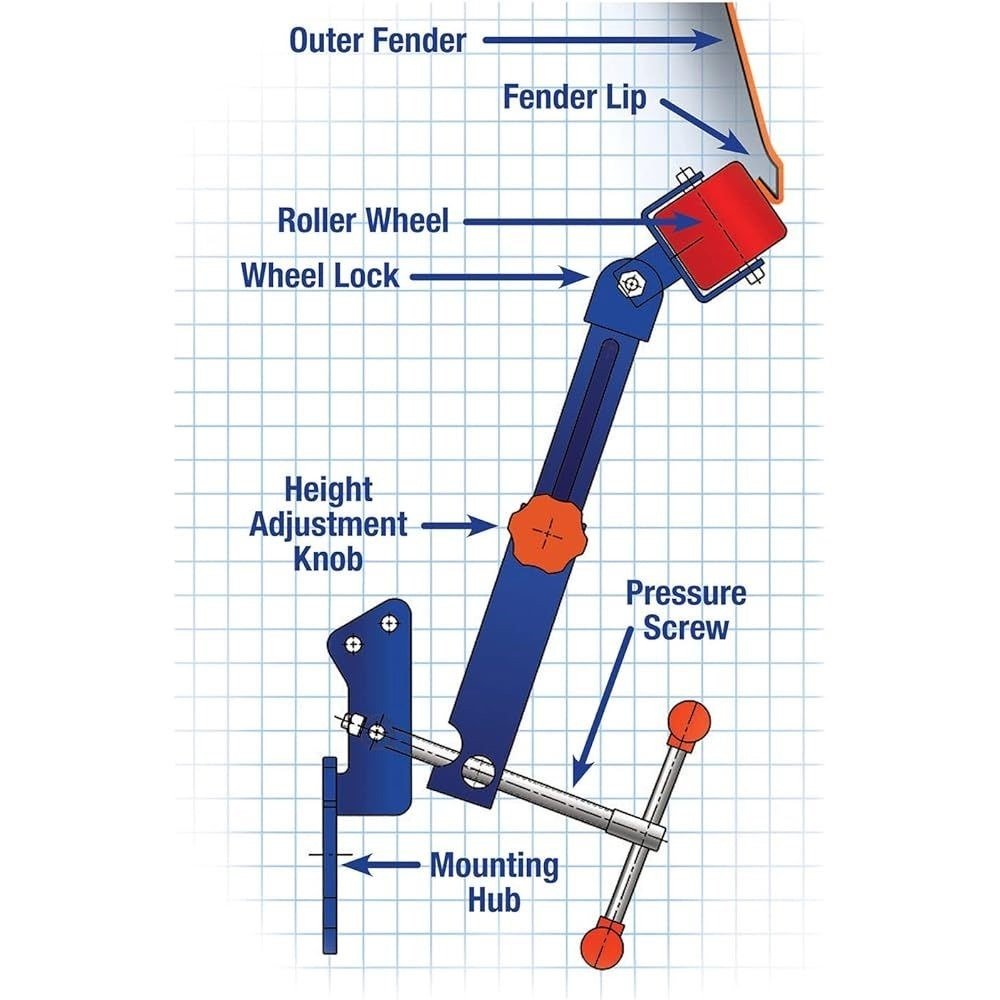
Yes, the same fender roller you’d use to roll fenders can be used in reverse. You’ll basically follow the rolling process backward, applying gentle pressure to undo the roll. The fender roller attaches to the wheel hub, and you can adjust the pressure and angle as you slowly work the fender back into its original shape. It’s a slow process, but it works.
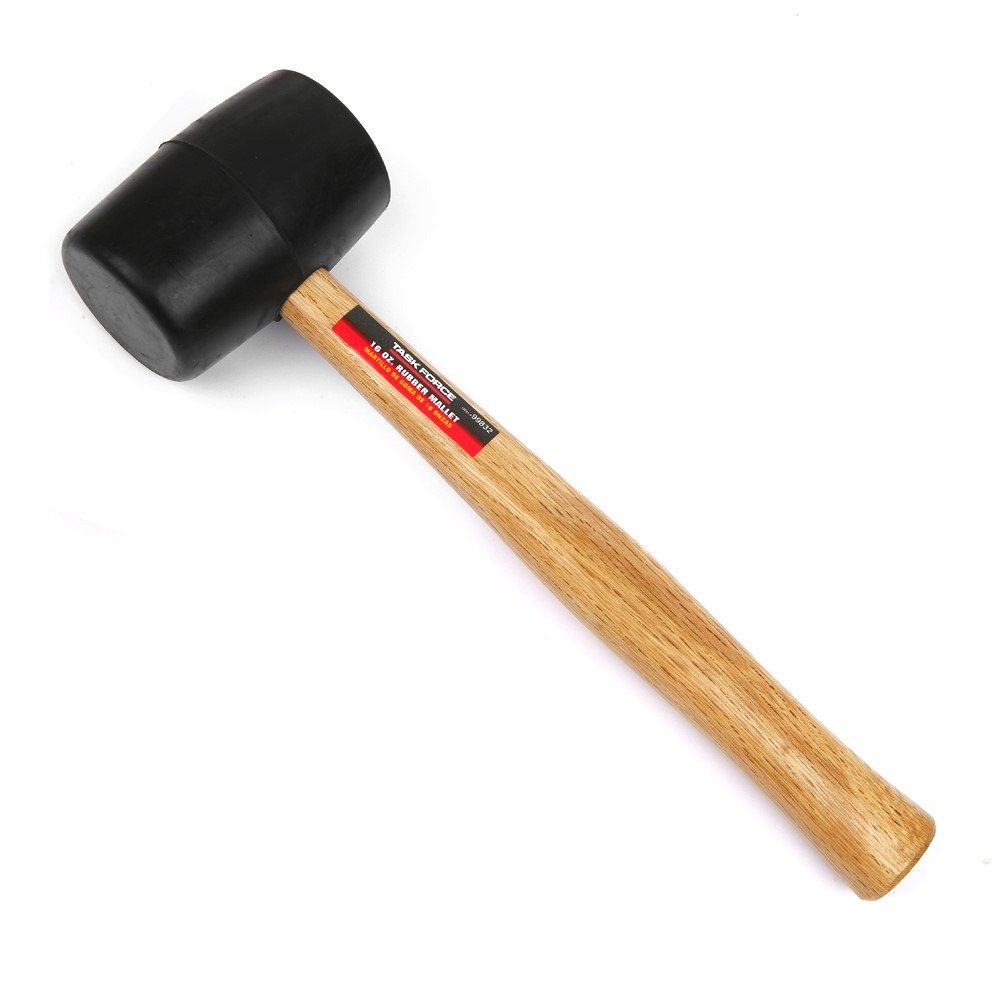
3. Mallet or Hammer (with Caution!)
Sometimes, even with a fender roller, there are spots that need a bit more attention. This is where a mallet or hammer comes in handy. Be very careful, though—you don’t want to pound on your fender too hard or you’ll cause more damage. A rubber mallet is preferred because it’s gentler on the surface and less likely to dent the metal.
4. Jack Stands or Car Lift
You’ll need proper access to your wheel wells to unroll the fenders, and that means getting the car off the ground. Whether you use jack stands or a car lift, make sure your car is stable and secure before you start working. You don’t want the car shifting or moving while you’re mid-job.
5. Protective Gear
Last but not least, don’t forget safety gear. Working on your car’s fenders involves heat, sharp edges, and heavy tools. Wearing gloves, safety glasses, and sturdy shoes is just smart. You want to protect yourself from burns, cuts, or worse.
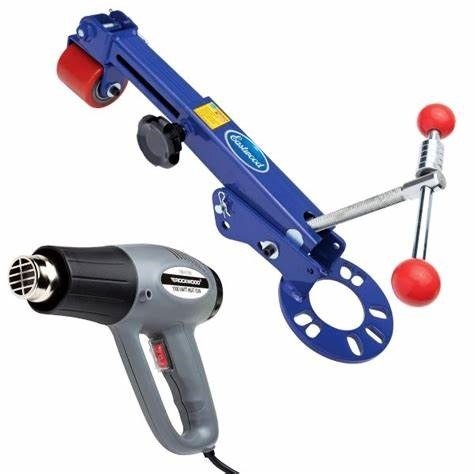
Fender roller tool and heat gun used for unrolling car fenders
A Few Extra Tips
Now that you know what tools you’ll need, here are a few things to keep in mind before you start:
- Work Slowly: Unrolling fenders takes time. Rushing the process increases your chances of damaging the fender or cracking the paint.
- Use Heat Wisely: Applying heat is essential, but make sure you don’t overdo it. You only need to soften the paint, not melt it.
- Check Your Progress Regularly: After each adjustment, step back and look at your fender. It’s easy to overcorrect, so keep checking to make sure you’re restoring it to the original shape without creating new issues.
Step-by-Step Guide to Unrolling Fenders Without Damaging Paint
Alright, now that you’ve got the right tools and know the basics, let’s dive into the step-by-step process of unrolling your fenders. The key here is patience and precision. Rushing through this job is how you end up with cracked paint or bent metal, and nobody wants that.
Here’s how you can unroll your fenders safely, without damaging your car’s paint or bodywork:
Step 1: Lift the Car and Remove the Wheel
First things first—you need to get proper access to your fender. Use a car jack or jack stands to lift the car and make sure it’s stable. Safety should always come first, so double-check that your car isn’t going to wobble or fall while you’re working.
Once the car is up, remove the wheel. This gives you the space you need to work on the fender directly.
Step 2: Heat the Fender to Prevent Paint Cracking
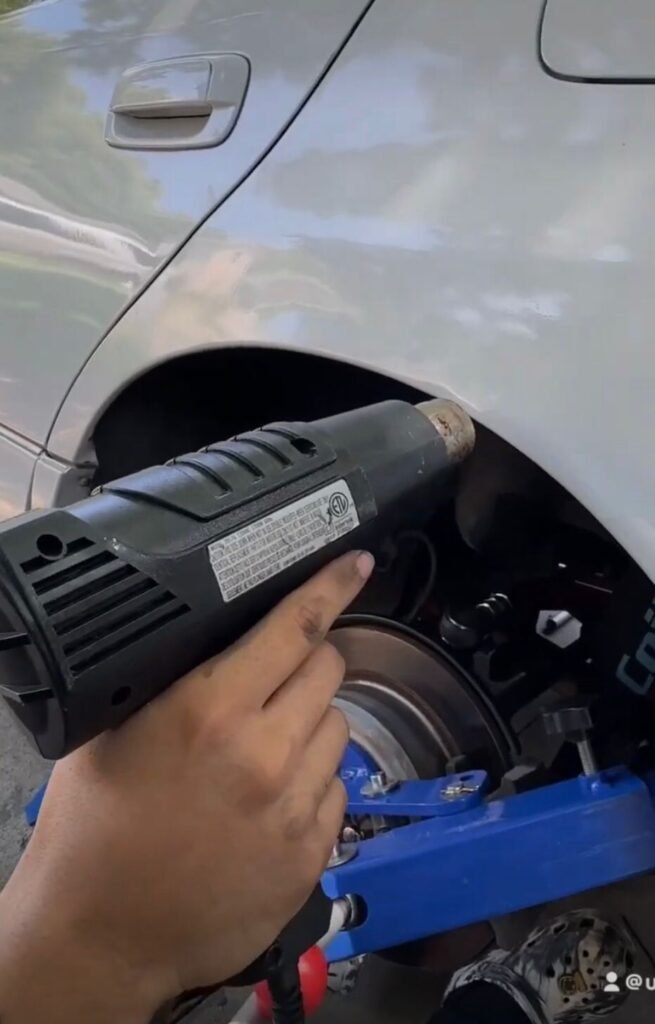
Now, this step is absolutely crucial. If you don’t heat the fender properly, you’re almost guaranteed to crack the paint. Use a heat gun and gently warm up the area where you’re going to start unrolling the fender.
Move the heat gun around constantly to avoid overheating one spot. The goal is to make the paint flexible, so it can stretch slightly instead of cracking when the metal moves. Focus on the part of the fender that was originally rolled—this is where you’ll apply pressure in the next step.
Step 3: Slowly Reverse the Rolling Process with a Fender Roller
Now for the main event. Attach the fender roller to your car’s hub and adjust it so that it sits snugly against the inner lip of the fender. You’re essentially using the same tool that rolled your fender, but this time you’re going to reverse the process.
Start applying very gentle pressure, and slowly work your way around the fender. Take your time—this isn’t a process you want to rush. As you roll the tool, the metal will start to move back into its original position.
Pro tip: Keep heating the fender as you go to ensure the paint stays soft and flexible.
Step 4: Use a Mallet for Small Bends or Hard-to-Reach Spots
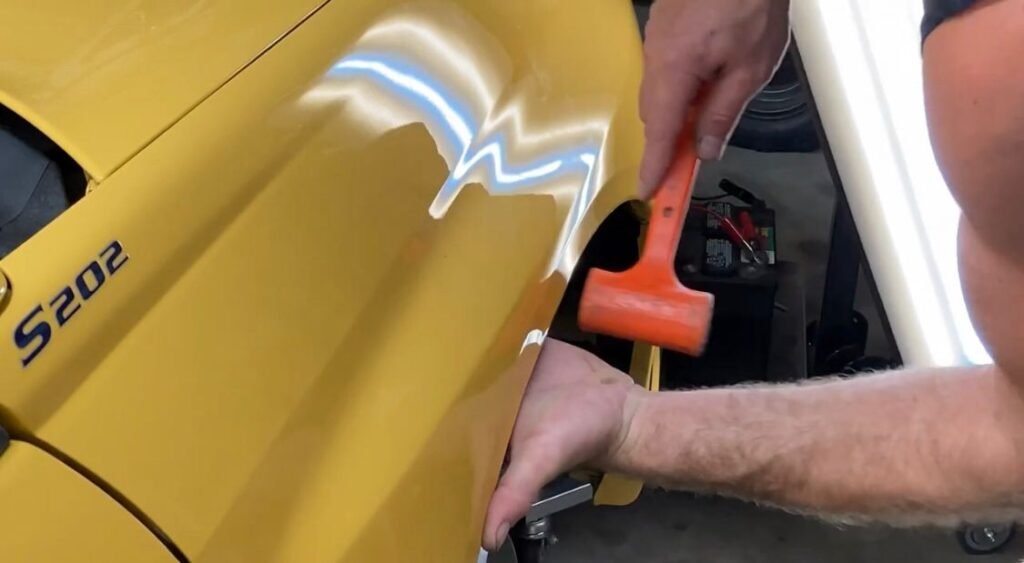
Even with a fender roller, there might be some areas that are tricky to unroll. For these spots, you can use a rubber mallet or hammer. Be gentle! Lightly tap the areas that need extra attention, but don’t hit too hard, or you risk denting the fender.
A rubber mallet is softer than a regular hammer, so it’s perfect for this type of work. If you’re working on plastic fenders, be even more cautious since plastic can crack more easily under force.
Step 5: Check the Fender’s Fit, Adjust as Needed, and Reassemble
Once you’ve unrolled the fender, step back and take a look at your work. Is the fender looking good? Did it return to its original shape? If there are still some areas that need tweaking, go back with the fender roller or mallet and make the necessary adjustments.
Once you’re happy with the result, you can reassemble the wheel and lower the car back to the ground. Give everything one last inspection to make sure everything fits properly and there’s no rubbing when the wheel turns.
Common Mistakes to Avoid When Unrolling Fenders
Unrolling fenders isn’t rocket science, but there are definitely some mistakes you’ll want to avoid. Here are a few common pitfalls and how to steer clear of them:
1. Overheating the Fender and Damaging the Paint
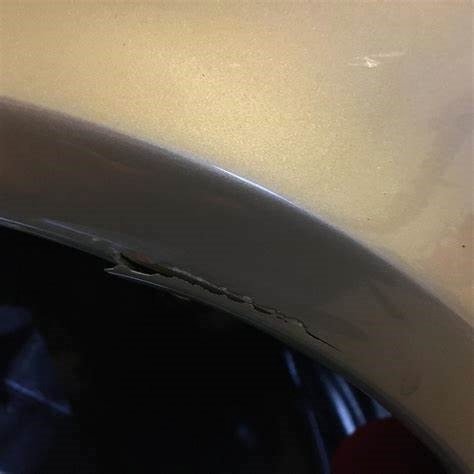
One of the biggest mistakes people make is overheating the fender when using a heat gun. While you do need to heat the area to prevent cracking, too much heat can actually cause the paint to bubble or even burn. Keep the heat gun moving and don’t focus on one spot for too long.
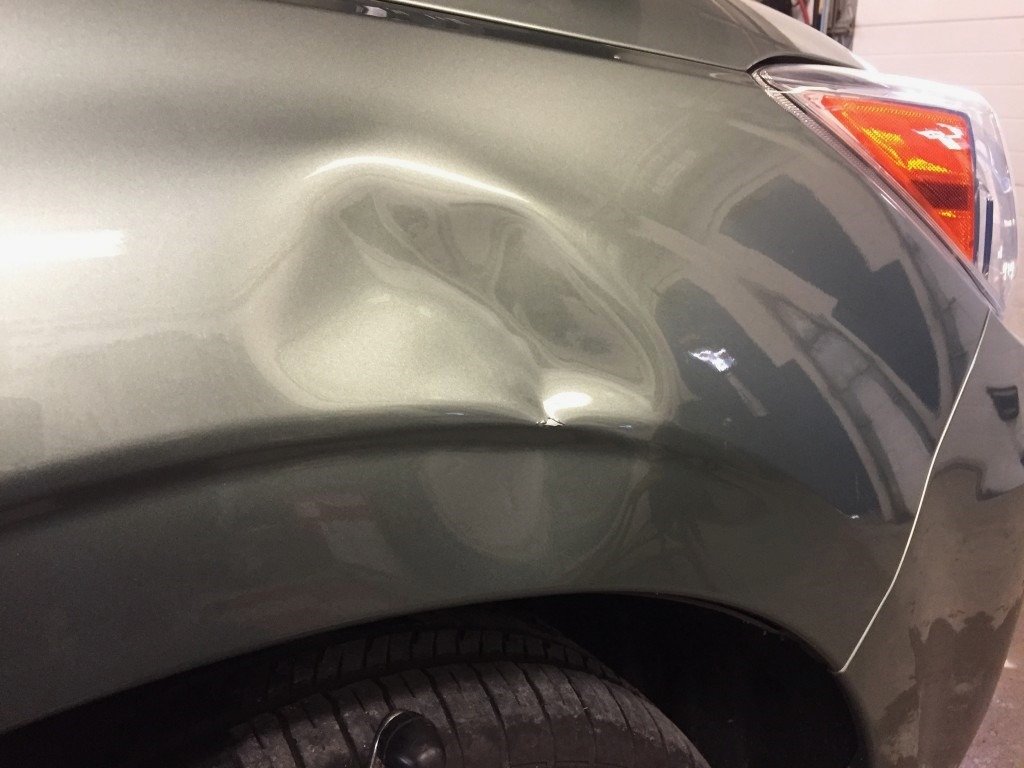
2. Using Too Much Force and Denting the Fender
It’s easy to get frustrated when things aren’t moving as fast as you’d like, but don’t let that frustration lead to using too much force. Unrolling fenders should be a slow, steady process. Applying too much pressure with the fender roller or hammer can dent the metal or, worse, warp it permanently.
3. Skipping the Heat Gun Step
We’ve already covered this, but it’s worth repeating: Don’t skip heating the fender. Without heat, you’ll almost certainly crack the paint, which will cost you more in repairs later. Even if you’re working on plastic fenders, some gentle heat will help reduce the risk of cracking or splitting.
4. Not Securing the Car Properly
This is less about the fender and more about your safety, but it’s vital. Make sure the car is properly supported on jack stands or a car lift before you start. If the car shifts while you’re working, it can lead to serious injury.
5. Rushing the Process
Patience is key when unrolling fenders. If you rush, you’re more likely to make mistakes. Give yourself plenty of time to work, and don’t try to cut corners. It’s better to take a bit longer and do it right than to rush and damage your car.
In the next section, we’ll cover when it might make sense to call in a professional instead of doing the job yourself!
When Should You Consider Professional Help for Unrolling Fenders?
Unrolling fenders can be a DIY project, but sometimes it’s better to leave it to a professional. It’s more complex than rolling fenders, and if your fenders are tricky or damaged, it may require more than a simple fix. Even with the right tools and experience, not everyone has the time, patience, or skills for the job. If you’re unsure, it’s worth considering a pro. Here are a few situations where professional help might be your best option.
1. The Damage is Too Severe
If your fenders are heavily rolled, damaged, or bent out of shape, it might be difficult to unroll them back to their original form without risking more damage. Fenders with serious dents or creases require expert knowledge to reshape properly.
Professionals have the experience and specialized tools that allow them to handle even the most severe fender issues. Plus, they know how to prevent further damage to your paint and bodywork, which can be tricky to manage on your own.
2. You’re Worried About Cracking Paint
Cracked paint can turn a minor fix into a costly repair. If you don’t feel confident about using a heat gun properly or if the paint on your fender is already showing signs of wear, it might be smart to get a professional to handle it. They know exactly how much heat to apply and can often blend or repair paint on the spot if any minor cracks occur.
3. You Don’t Have the Proper Tools
While basic tools like a heat gun and mallet might be in your garage, specialized ones like a fender roller or car lift may not be. Buying or renting these for a one-time job can be costly. Body shops already have the necessary equipment, making it easier and more efficient to get the job done without the extra expense.
4. You’re Short on Time or Patience
Let’s face it: unrolling fenders isn’t a quick job. You’ll need to go slow and steady, heating and adjusting the fender in small increments to get the best results. If you’re short on time or just don’t have the patience for a detailed project like this, a professional can get the job done in a fraction of the time.
5. You Want to Maintain Your Car’s Value
If you own a high-end or classic car, maintaining the value is probably one of your top priorities. DIY projects gone wrong can reduce the car’s resale value. Getting a professional to handle body modifications ensures that the work is done cleanly and without any visible damage. This way, your car stays in pristine condition, preserving its value over time.
How Much Does Professional Fender Unrolling Cost?
You might be wondering about the cost of hiring a professional. Typically, unrolling fenders costs between $100 and $300 per fender, depending on the damage, car type, and fender condition. While more severe issues like repainting can increase the price, it’s often worth it for the peace of mind. A botched DIY job could end up costing even more if it leads to cracked paint or the need to replace the fender.
How to Prevent Fender Damage in the Future
Now that you’ve gone through the trouble of unrolling your fenders (or getting a pro to do it), the last thing you want is to end up in the same situation again. Preventing future fender damage is all about understanding the fitment of your wheels and tires, as well as driving habits that could stress your car’s body.
Here are a few tips to avoid having to unroll or repair fenders again:
1. Choose the Right Wheel and Tire Size
A lot of the problems with fenders come from trying to squeeze wider tires into a wheel well that’s just a bit too tight. Before making any upgrades, make sure the wheel and tire size fits your car’s specs. Look for tires that give you a balance between performance and fitment. If you’re lowering your car, ensure that the new setup leaves enough clearance to avoid rubbing against the fenders.
2. Regularly Inspect Your Fenders
You don’t need to wait for serious damage to start checking your fenders. Make it a habit to look at them whenever you’re doing other maintenance like changing the tires or washing your car. Catching small issues early—like a slight roll or a minor dent—can prevent them from becoming bigger problems down the road.
3. Be Cautious on Rough Roads
Rough terrain, potholes, and uneven roads can all cause stress on your car’s fenders, especially if your suspension is set up for a low ride. When possible, avoid rough roads or drive cautiously to reduce the impact on your fenders and the wheel wells.
4. Adjust Your Suspension Properly
If you’ve lowered your car or are considering lowering it, make sure the suspension is adjusted properly. Too low, and you risk the tires rubbing against the fenders, especially when making tight turns or hitting bumps. A well-adjusted suspension ensures that your tires have enough clearance, even in tight spots, reducing the need to roll or unroll your fenders in the first place.
5. Consider Fender Flares or Guards
If you’re planning on using wider wheels, consider adding fender flares or guards. These are great for creating extra space between the tires and fender, reducing the chance of rubbing. Plus, they can give your car a more aggressive look while keeping your fenders protected.
Conclusion:
So, after reading through all this, the big question is: should you unroll your fenders? The answer really depends on your situation. If your rolled fenders are causing issues with fitment, aesthetics, or tire rub, unrolling them might be the best solution. However, it’s important to approach the job with care, the right tools, and a good understanding of the process to avoid damage.
FAQs About Unrolling Fenders
If you’re new to the idea of unrolling fenders, you probably have a few questions about the process, what’s involved, and whether it’s worth doing yourself. Let’s dive into some of the most common questions people ask when it comes to unrolling fenders. This section should give you clear, no-nonsense answers so you can make the best decision for your car.
Q1: Can you unroll plastic fenders?
A1: Yes, but it’s a bit more delicate than unrolling metal fenders. Plastic fenders are more prone to cracking if they aren’t handled carefully. When working with plastic, it’s crucial to apply the right amount of heat to soften the material without overheating it. You should also use very gentle pressure when reversing the roll. Plastic fenders can return to their original shape, but take your time and be extra cautious.
Q2: Does unrolling fenders affect the car’s appearance?
A2: If done correctly, unrolling fenders won’t have a noticeable impact on your car’s appearance. The goal is to restore the fenders to their original factory condition, so they should look just like they did before they were rolled. However, if too much force is applied or the process isn’t handled with care, you risk denting the fender or cracking the paint, which could negatively affect how the car looks.
Q3: Will unrolling my fenders void my warranty?
A3: It depends on the terms of your car’s warranty. Modifications like fender rolling or unrolling could potentially void a portion of your warranty, especially if it involves structural changes to the body of the car. However, this isn’t always the case, and it’s worth checking with your dealership or warranty provider. If the unrolling process doesn’t cause any significant alterations or damage, your warranty may remain intact.
Q4: Can you unroll fenders on older cars?
A4: Absolutely, but older cars can be more challenging. The paint on older vehicles is often more fragile and prone to cracking, and the metal itself might be more brittle. This means you need to be even more careful with applying heat and pressure. It’s totally possible to unroll fenders on an older car, but patience and a gentle touch are essential to avoid causing damage to the bodywork.
Q5: How long does it take to unroll fenders?
A5: On average, unrolling a fender takes between 1 to 2 hours, depending on your experience and the condition of the fender. If you’re new to the process or working on more complicated fenders, it might take a little longer. The key is not to rush the job—going slowly ensures you don’t cause any damage. Professionals might get the job done faster, but the DIY approach requires time and care.
Q6: Can you roll and unroll fenders multiple times?
A6: Yes, you can roll and unroll fenders more than once, but each time you do, you’re putting more stress on the metal or plastic, and that increases the risk of cracking or denting. If you’ve already rolled your fenders, unrolling them can still be done carefully. Just be mindful that too many modifications can weaken the fender over time, especially around the lip where the metal is most flexible.

